Applications
Projects, applications, API keys, teams, and access control.
An application represents a single NestJS service instrumented with the SDK - a REST API, a GraphQL server, a worker processing a queue, a microservice. Applications live inside a project, and a project's dashboard shows telemetry either per application or aggregated across all of them.
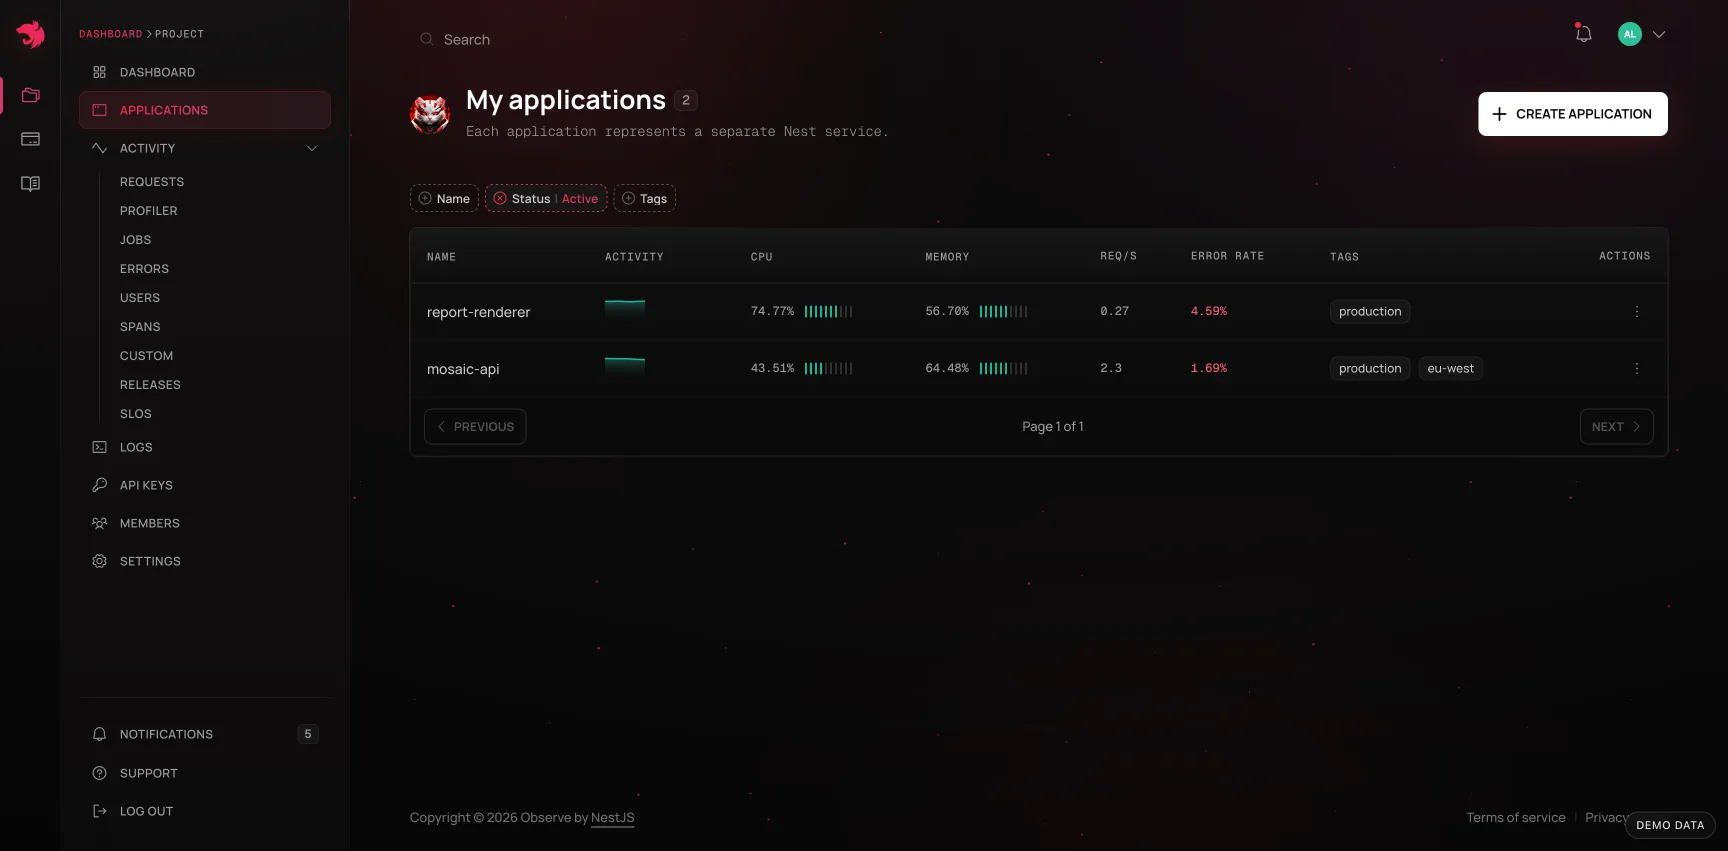
Creating an application
From a project, open Applications and add a new one by name. Applications can also carry tags (see Tags) so you can group and filter them - by service type, by team, by whatever grouping makes sense for your project.
An application doesn't need any configuration beyond a name: everything else - the routes it serves, the jobs it processes, the metrics it reports - is discovered from the telemetry the SDK sends once it starts running.
Each row on the Applications list shows a Last seen column - when its runtime last reported in, from the same heartbeat signal a telemetry silence alert watches. A silence long enough to matter is highlighted the same way an elevated error rate is, so an application going quiet is visible just by looking at the list, not only when an alert fires.
Status pages
On Pro and above, an application can have a public status page: its availability and p95 response time for each day your plan keeps, up to 90, at an address you can hand to the people who use it. On the Applications list, click the broadcast icon on the application's row - or choose Status page from its menu - and switch it on; Write or Admin access is enough. The icon turns green once the page is published. Withdraw it from the same place; publishing it again brings back the same address. Response times are on by default; switch Show response times off and the page shows availability alone.
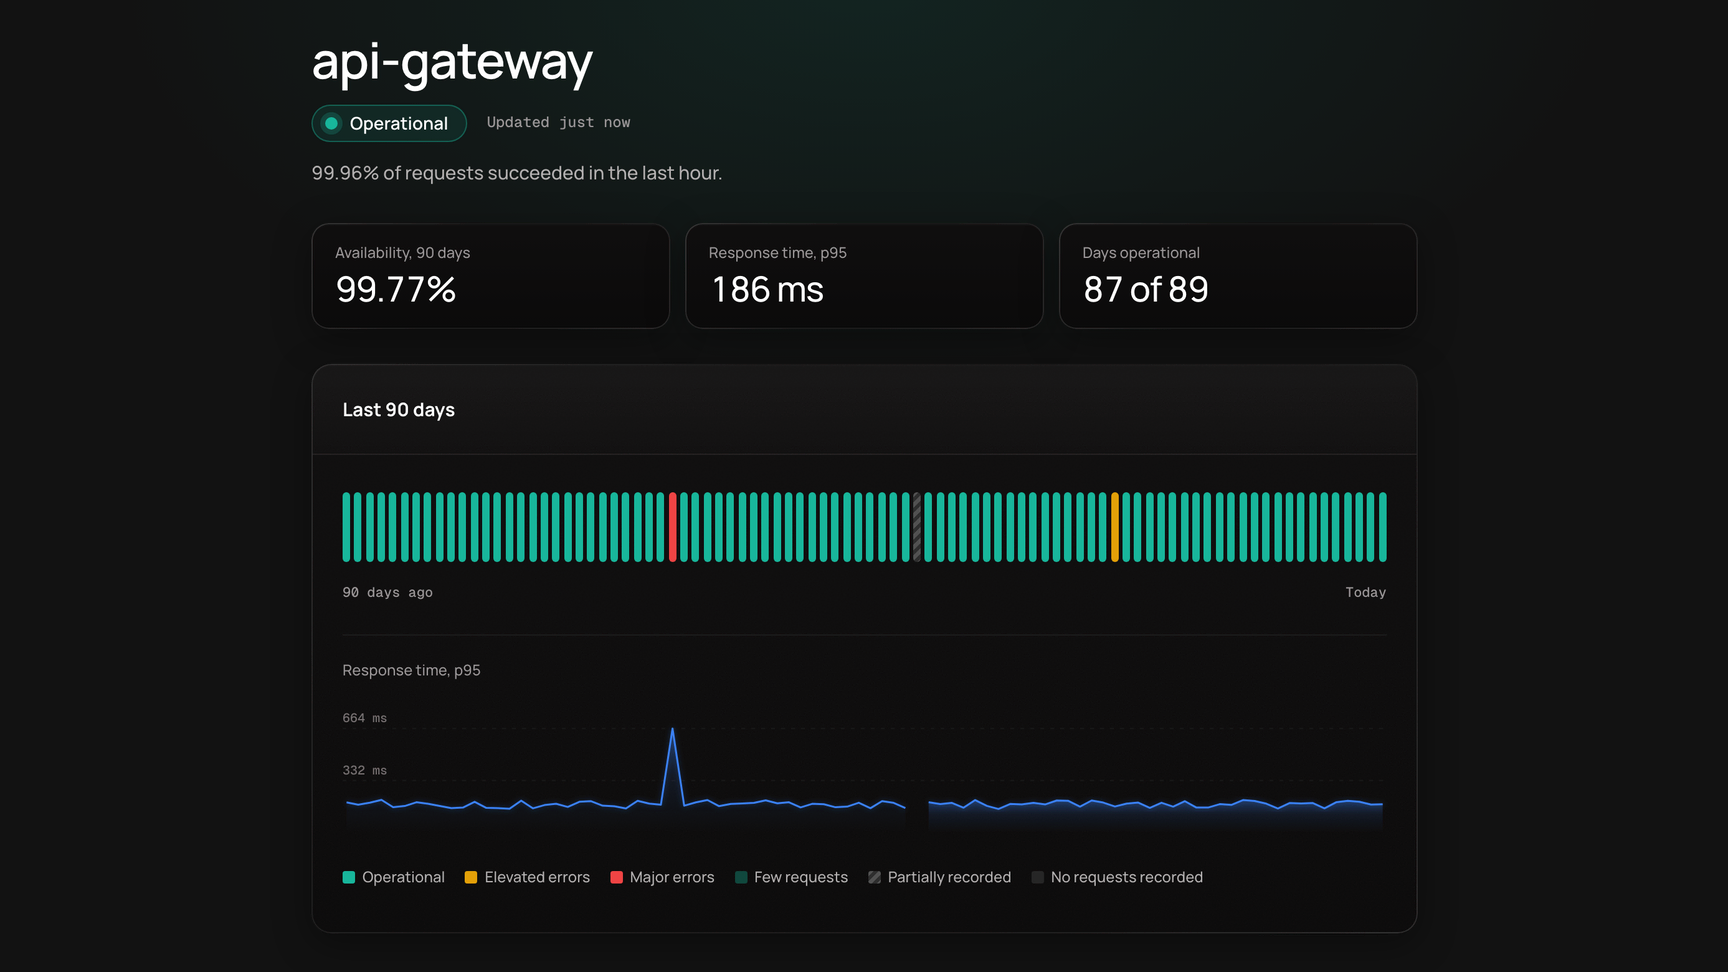
Availability is the share of requests that didn't fail with a server error (5xx); client errors (4xx) don't count against it. A day is Operational at 99.5% or more, shows Elevated errors from 95% and Major errors below that, and with fewer than 20 requests it shows its figure without a state. The page shows percentages and latency only, never how much traffic the application gets.
It never calls an application down for something Observe did. A day with no requests recorded says exactly that, and a day when an overage pause was in force - which keeps server errors and drops the rest - is marked partially recorded and left out of the figures. The page refreshes every minute, and stays out of search engines.
API keys
To send telemetry, an application authenticates with a project API key. Generate one from the project's API Keys page.
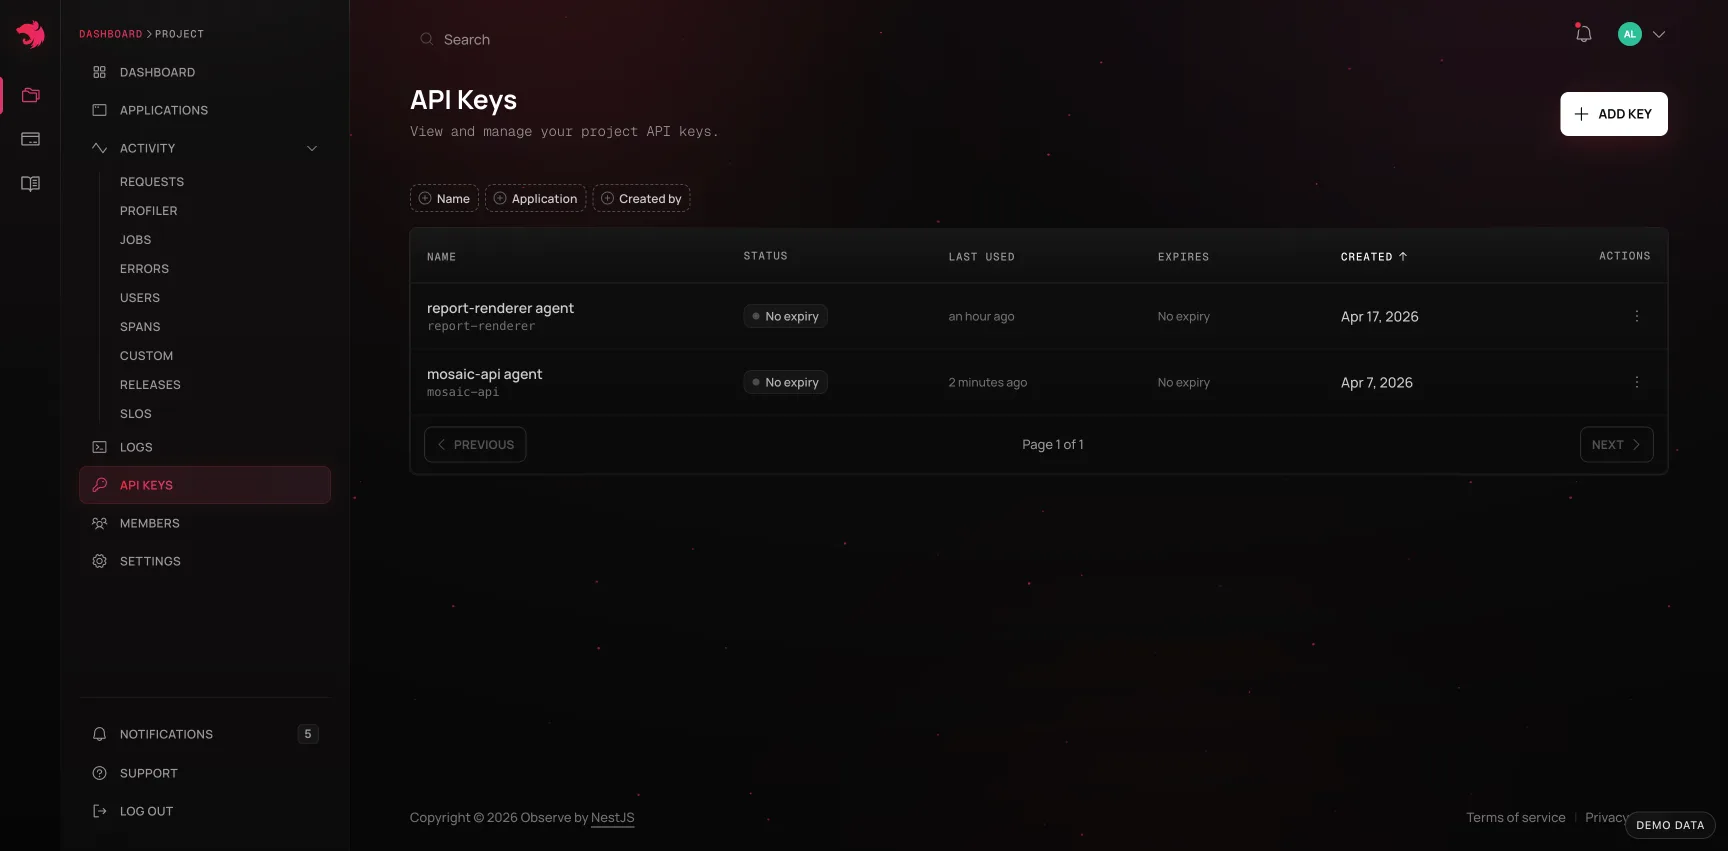
Each key has a name (to identify it - one for local development, one for CI, one for production) and an optional expiration date. Give the key to the SDK via configuration or an environment variable when you instrument your application - see SDK. API keys are scoped to a project: any application whose telemetry should land in that project's dashboard uses the same key.
A key can also come from the terminal: approve the code npx @nestjs/observe link prints at observe.nestjs.com/link, pick the application, and the command writes the new key into the project's .env - see SDK → Linking from the terminal. Those keys are listed here like any other, named CLI and the time they were issued, and expire after a year.
Remove a key at any time from the same page; any application still using it will stop being able to send telemetry.
Teams
A team is a collection of users. Every project belongs to exactly one team, so adding someone to a team gives them access to every project that team owns (subject to the access level they're given on each project). Manage your teams from the account-level Teams page.
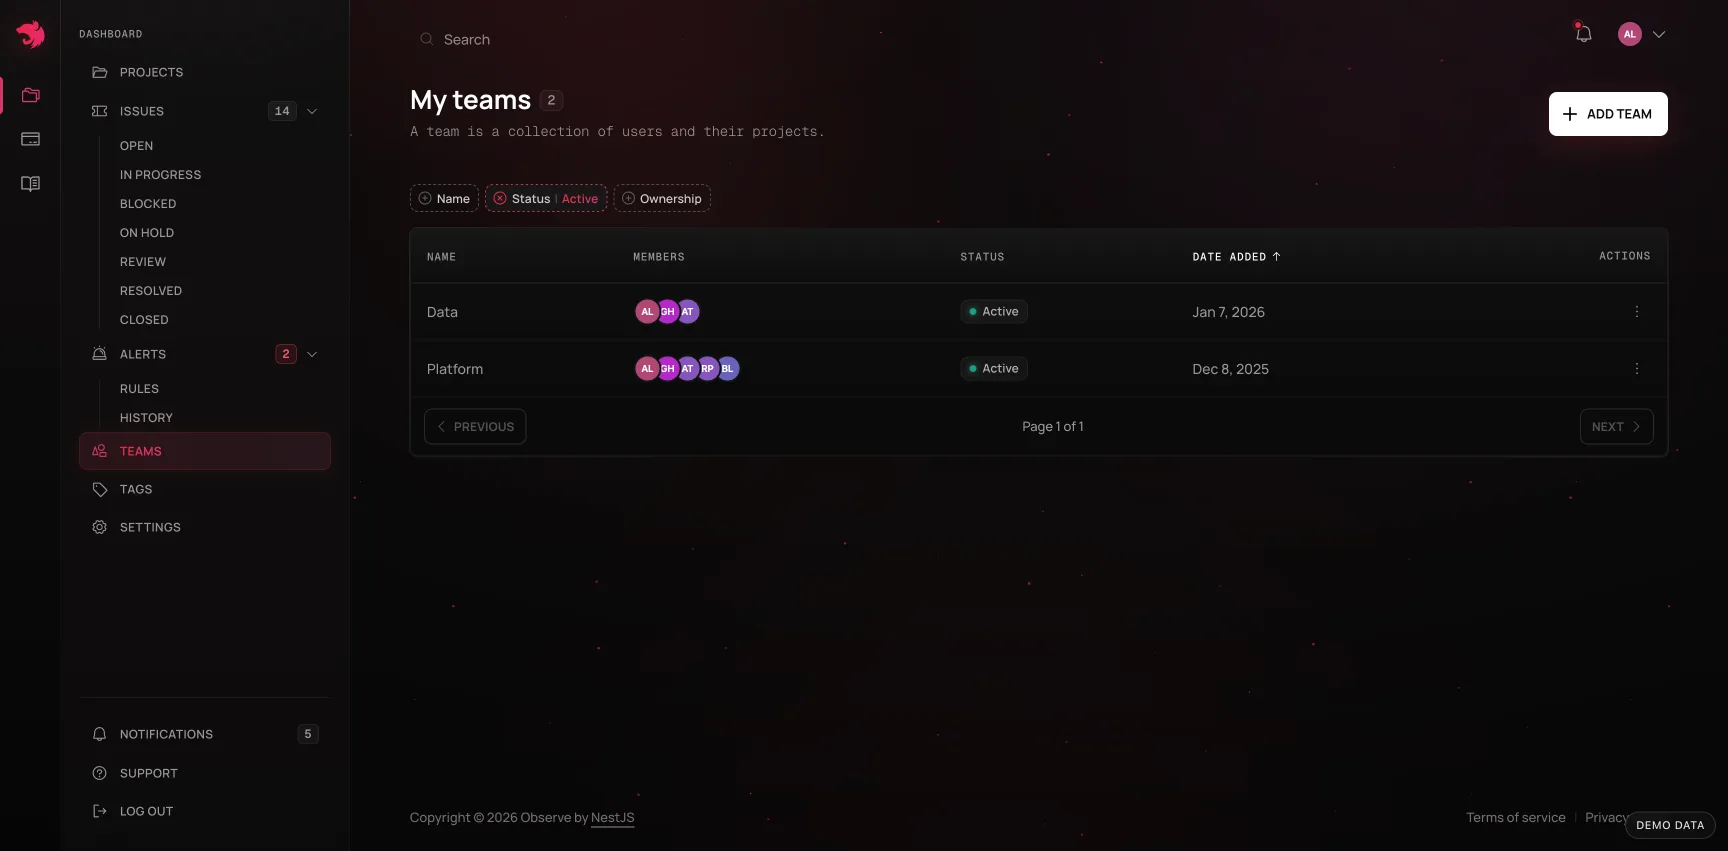
Removing a user from a team removes their access to every project owned by that team.
Members and access control
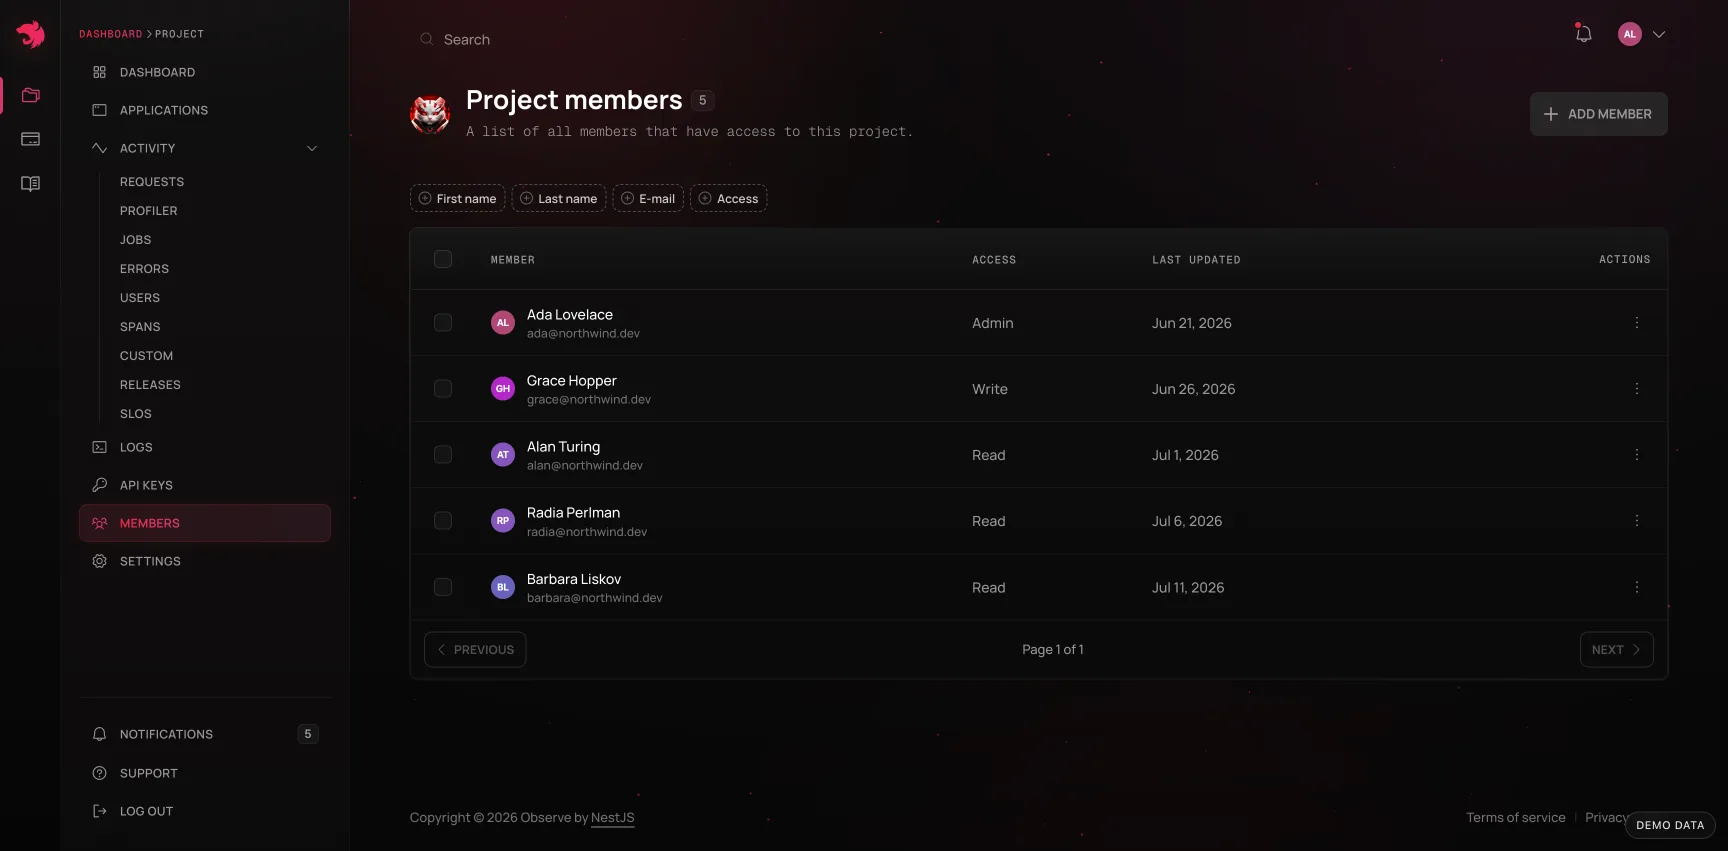
Within a project, add members of its team and set their access level - Read, Write, or Admin, or Read alone on Free and Personal - from the project's Members page. People join the team from the team's own Members page first; an invitation that hasn't been accepted shows as pending until it is.
Two-factor authentication
On every plan, a team's owner can require two-factor authentication (2FA) of everyone in the team. Switch on Require for everyone under Teams → SSO & 2FA: it asks you to confirm, saying how many members don't have 2FA yet. The switch waits until your own account has 2FA on, under Settings → Two-factor authentication, so you can't lock yourself out.
- Members without 2FA can only reach the page that sets it up. In the dashboard, a full-page Two-factor authentication screen - a QR code and a field for the 6-digit code - replaces everything else, and over MCP every request is refused with a 403. MCP is held straight away, and a dashboard session that's already open within the hour. Turning 2FA on from that screen lets them straight back in.
- Only the owner sees who has it: the team's Members list marks each member 2FA, Needs 2FA or No 2FA.
- Single sign-on doesn't skip it. A member with 2FA on is asked for the code after signing in through SSO, as with every other sign-in method.
- Switching it off frees everyone at once, and an archived team no longer holds anyone to it.
Single sign-on
Scale and Enterprise teams can require members to authenticate through an SSO connection instead of a password. Configure this from Teams → SSO & 2FA: add the connection details, verify the domains you want routed through it, and switch on enforcement once at least one domain is verified. Enforcement is a deliberate, separate step from saving the connection - nothing is required of your team until you turn it on.
Audit log
On Pro and above, a team's owner can see who changed what in the team. Open the team's Members page and choose Audit log in the bar at the bottom, which also shows the team's latest change. The log records:
- Members: invitations, additions and removals, people joining by invitation or through single sign-on, and the project roles each member is given, changed to or removed from.
- Sign-in rules: the 2FA requirement, and single sign-on's connection, enforcement and domains. A changed connection shows which settings moved and their values before and after; a client secret only ever shows as replaced.
- API keys: keys created and revoked, including the ones that go with an application or project when it's deleted.
- Teams and projects: created, renamed and deleted.
Each entry says when, who, what, and the IP address and browser the change came from. A change a coding agent made through the MCP server is marked MCP, and a key approved for the CLI's link command CLI. Changes Observe makes itself, such as removing members when a plan moves to Free, are signed Observe. Filter the log by kind of change, by who made it, or by project.
- Every plan is recorded. Reading the log needs Pro or above, but changes are recorded on every plan, so after an upgrade the history from before it is there.
- Only the team's owner can open it, as it names every member's address and browser.
- Entries are kept for a year.
Tags
Tags are labels, owned by a team, that you can attach to applications to organize them - for example by service type or by the part of the system they belong to. Manage the set of available tags from the account-level Tags page, then apply them to individual applications from an application's settings.